Getting Started With GemJar
GemJarIntroduction: Welcome to GemJar, a powerful tool designed to streamline your testing and automation processes . Whether you're a seasoned engineer or new to automation testing, this guide will help you get up and running your automation with GemJar quickly and efficiently.
Creating Your First Test
Follow these steps to get started:
Getting started with Cucumber
1. Setting up the project:
Create a simple Maven/Gradle Project Using Any IDE (Integrated Development Environment) for example IntelliJ, Eclipse, etc.
Introduction: Welcome to GemJar, a powerful tool designed to streamline your testing and automation processes . Whether you're a seasoned engineer or new to automation testing, this guide will help you get up and running your automation with GemJar quickly and efficiently.
Creating Your First Test
Follow these steps to get started:
Getting started with Cucumber
1. Setting up the project:
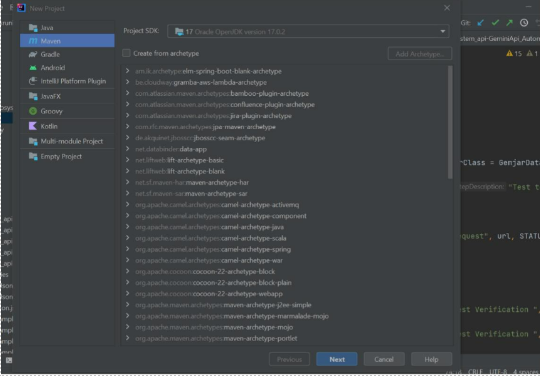
- Adding dependency to pom.xml:
Add latest GemJar Dependency
Add the GemJar dependency into your project: –
Maven
<dependency>
<groupId>com.gemecosystem.gemjar</groupId>
<artifactId>gemjar-core</artifactId>
<version>1.3.5</version>
</dependency>
Gradle
testImplementation(“com.gemecosystem.gemjar:gemjar-core:1.3.5”)
- Creating the config file:
Create a gemjar-config.yml file in the resources folder.
environment: beta
project_name: Demo_Project
jewel_user: user_name
jewel_bridge_token: bridge_token
enter_point: https://apis.gemecosystem.com/gemEcosystemDashboard/v1/enter-point
report_name: Demo_Report
email_report: Y/N
email_to: email_id
email_cc: email_id
console_report: Y/N
event_firing: Y/N
jewel_screen_shots: Y/N
auto_kill: Y/N
tags: ‘@cucumber_tag’
glue_code: package path of step definitions
gemheal: Y/N
browser_options:
– “–incognito”
– “–headless”
prod:
browser_name: chrome
launch_url: application_url
beta:
browser_name: edge
launch_url: application_url
azure_integration:
azure_project: project_name
azure_pat_token: token
azure_workflow:
– Bug Fixed
azure_assigned_to: email_id
azure_testcase_flag: Y/N
jira_integration:
jira_project_id: project_id
jira_access_token: access_token
jira_email: email_id
jira_workflow:
– BUG ACCEPTED
jira_testcase_flag: Y/N
- Creating feature file:
Create a folder in the resources name feature and create a feature file in it.
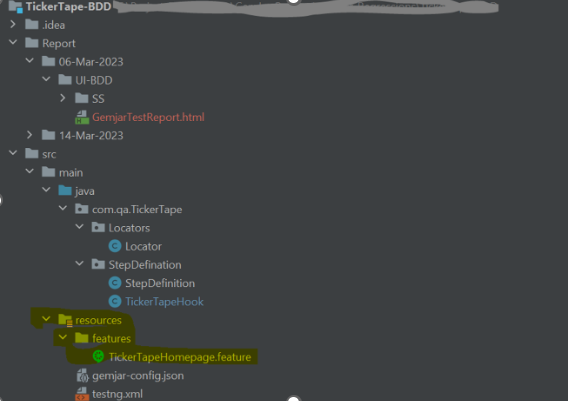
Test scenarios in feature file:
Write all the Test Scenarios in the feature file itself using the Gherkin language or according to the Cucumber rules.
Creating step definition file:
Create the package for the Step Definition and write the Step Definition into it using the Cucumber rules or syntax.
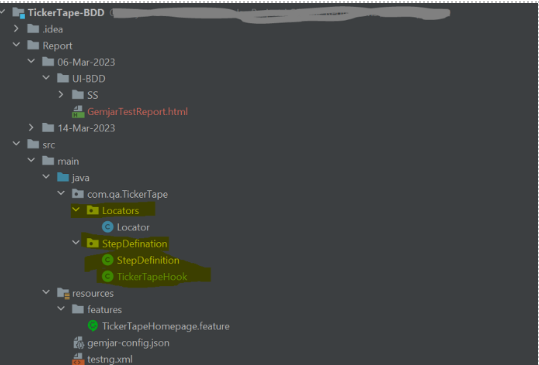
Test implementation and execution:
After creating the feature file and the step definition file, the user must pass the package name of the Step Definition with the key “glue_code” and the path of the feature file with the key “feature” in the gemjar-config.yml file.
- Note: If the path of the feature file is not passed through gemjar-config.yml file then it will take the feature file from the resources folder by default.
Getting started with TestNG
Setting up the project:
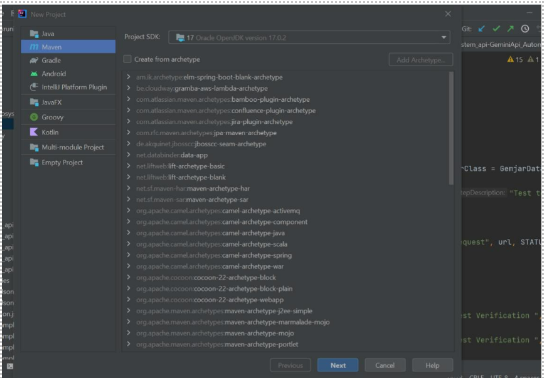
Create a simple Maven Project Using Any IDE (Integrated Development Environment) for example IntelliJ, Eclipse, etc.

